🌿 🌸
Grow from Seeds
2/25/20253 min read
Mini Gesneriads: growing from seeds
It is a pretty easy process, though it requires some patience.
First, we’ll describe the conventional way of doing this, and then we'll talk about our own modifications.
Growing Container: It should be wide and shallow. Anything from a condiment cup to a restaurant take-out tray will work. If it is transparent, you can see the moisture level of your soil. Otherwise, it might be tricky to know when and how much to moisten it.
Potting Medium: You can use fine peat moss combined with Perlite in a 2:1 ratio or a seed starter mix. It's better to choose one without any added fertilizer to avoid algae growth. It is recommended to sift the medium to achieve a very fine texture. It is also a good idea to smooth the soil to prevent tiny seeds from falling deep into cracks, as they need light to germinate. Make the soil moist, but not soggy.
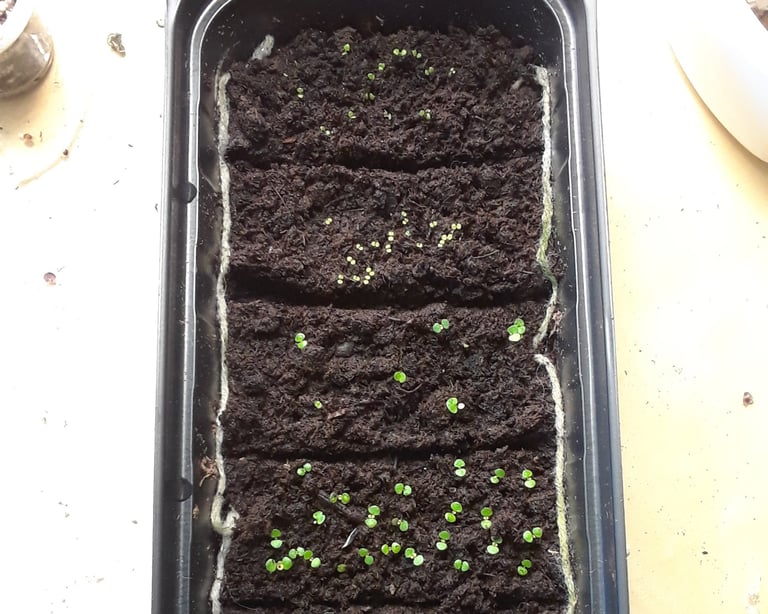
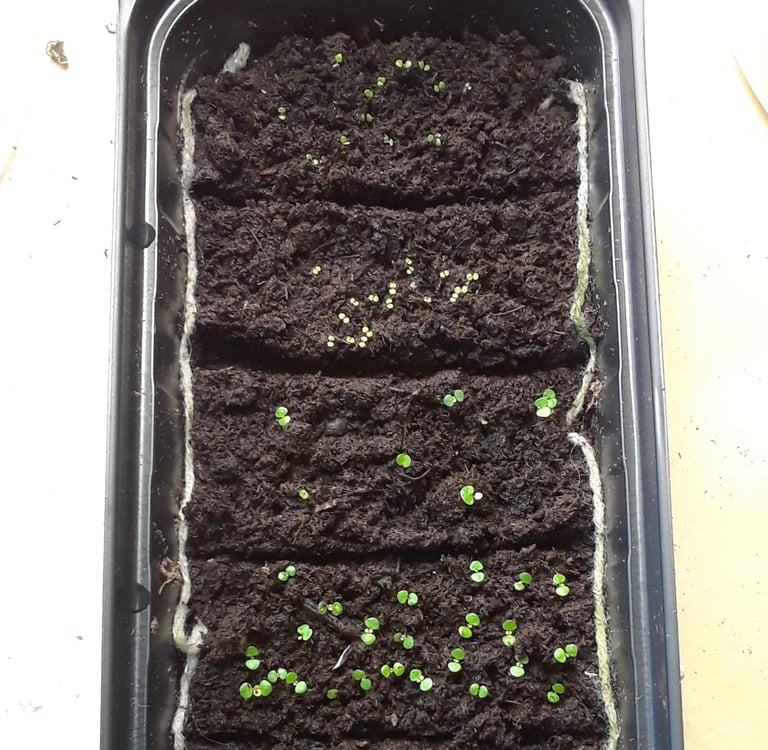
How to Sow Those Tiny, Dust-Like Seeds: Hold the seed packet with one hand, half-open, with the seeds in the fold. Gently tap this hand with your other hand while moving it over the soil to distribute the seeds in a controlled way. You don’t want them all in one spot—it will be quite challenging to separate the seedlings later. Cover the tray with a transparent cover (plastic lid, Saran wrap, or place it inside another transparent container).
*We recommend sowing only half the seeds at first. They have a high germination rate, and you may end up with more plants than expected! Keeping some seeds in reserve also gives you a backup in case of accidental spills or other issues.
Put your tray in a warm, well-lit place and practice patience. :)
In about 2-3 weeks, you can start checking for sprouting. It might take anywhere from 2 to 8 weeks to germinate. Our longest wait time was 2.5 months.
You may need to mist the soil from time to time using a spray bottle. If you’re like us in the beginning, checking the seeds several times a day, you’ll need to moisten them more often. :) However, it might be a good idea to open the lid regularly for air circulation.
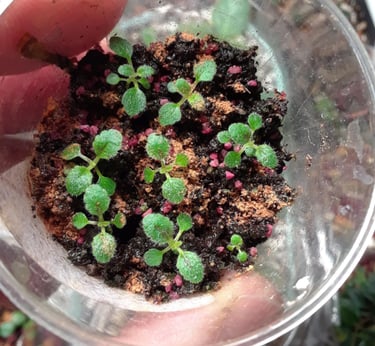
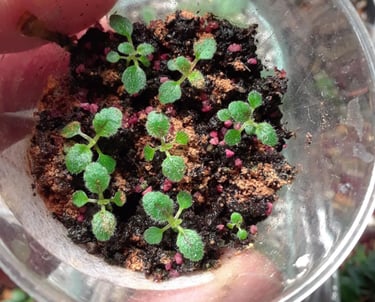
Thinning: When your seedlings are about 2 weeks old, thin them out to allow them to spread more evenly across the tray. You can use a wet toothpick to lift them up and place them in a new spot, making sure they don’t touch each other. It’s a good idea to repeat this process every 2-3 weeks (this is optional but helpful). Interestingly, this gentle root disturbance stimulates growth.
Once the seedlings form good tubers (usually around 2-3 months old), you can plant them in individual pots.
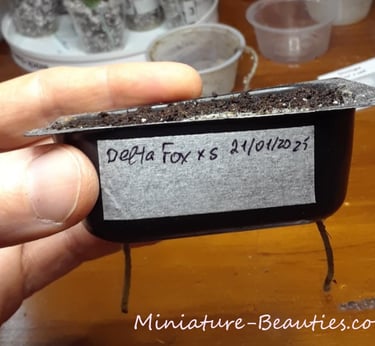
Label Your Pots!!! It’s also helpful to write the date of sowing and leave space to add the dates of thinning as you do it.
Now, about our major modifications:
When preparing the seedling tray, we make holes in the bottom corners and thread a piece of acrylic yarn through each pair of holes. The middle part of the yarn runs along the long side of the tray, laying on the soil, with the ends hanging down from the holes. Then we sow in the usual way and place the tray in a larger transparent container. (If using a condiment cup, we just thread one piece of yarn through one of the holes.)
When it’s time to moisten, we add a bit of water to the bottom of the larger container to make the soil moist but not soggy. Pour out any excess water and cover the lid. This method ensures that the seedlings aren't over-watered, as water just runs out of the bottom holes, and the new seedlings are not displaced by the water spray.
When the seedlings start to grow, we place the tray on a rack in a watering tray or another transparent container of the same size as the tray. This way, there is space between the two bottoms, where water will collect, and the yarn ends will act as wicks. All we need to do is make sure there is always some water in the bottom tray.
Note: For this method, you need to increase the Perlite-to-soil ratio to about 1:1.
Happy growing!
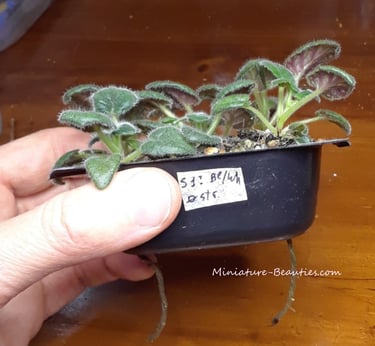
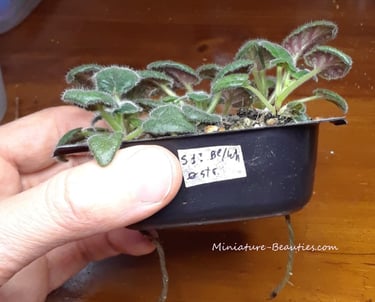
transplanted mini sinningia seedlings
grown sinningia seedlings, need to be transferred into larger container
freshly sawn mini sinningia seeds, labeled and dated
Miniature Beauties
Little Blooms. Lasting Delight
© 2024-2026. All rights reserved.
minigesneriads@gmail.com
Sharing miniature Gesneriads with fellow plant lovers
Questions or special requests are always welcome.